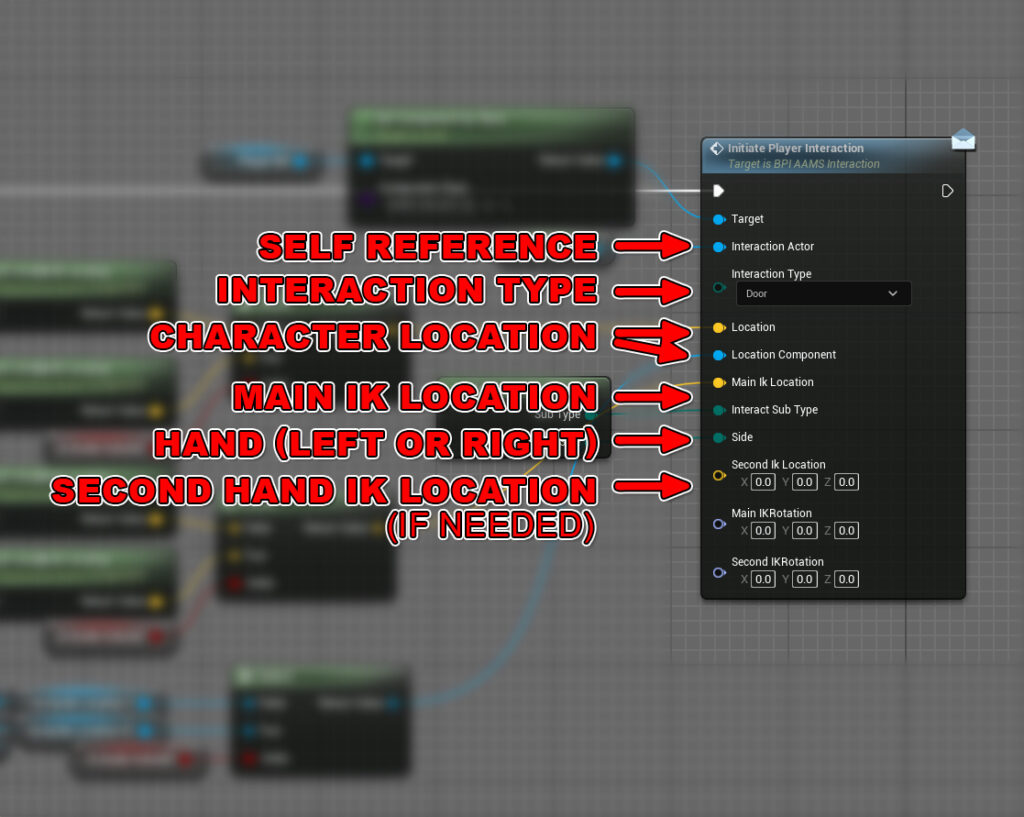
Introduction to the Interaction Component #
The Interaction System in AAMS v2.0 has undergone significant updates to enhance its universality and ease of setup. This system now features a streamlined approach, utilizing a universal Interact event applicable across various actors through the implementation of the BPI_AAMS Interact Object interface. This simplification not only broadens the system’s applicability but also speeds up development time by reducing the need for multiple, specific interaction setups.
Enhanced Functionality: #
- Interaction Animations: New animations have been integrated to realistically move the player towards and interact with objects. This adds a layer of realism and immersion, making interactions feel more intuitive and visually coherent.
- Broad Compatibility: The updated system is designed to work seamlessly with a range of AAMS actors and objects, including:
- AAMS Objects: Such as Push Objects and Ladders, which require physical interactions.
- Interactable Objects: Including Doors and Levers, facilitating environment manipulation.
- New Pick-Up Items: Enhancing player engagement through collectibles and usable items.
This comprehensive overhaul not only improves the functionality of the interaction system but also enriches the player’s experience by providing smoother and more context-sensitive interactions within the game environment.
Setting Up Interactions #
To enable interaction capabilities within your character in AAMS, follow these simple steps to integrate the Interact functionality:
- Add the Interact Component:
- Open your character blueprint.
- Add the
AC Interactcomponent to your character’s components list. This component manages the interaction processes and events.
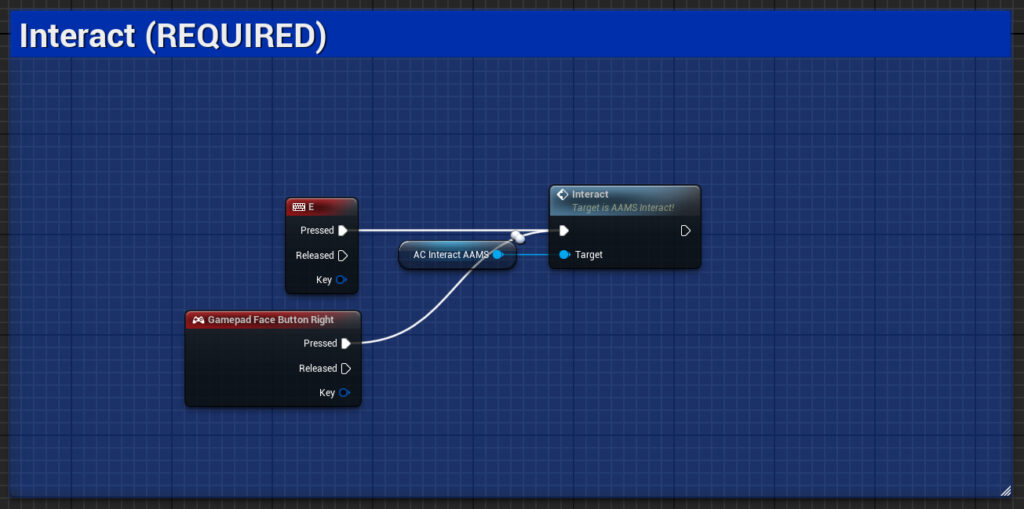
- Configure Input Binding:
- Navigate to the Input section of the blueprint.
- Create a new input action called “Interact” (if not already set up in your project settings).
- Connect this input action to the Interact event within the
AC Interactcomponent.
Using Existing Interaction Objects: #
- Add to Level: Simply place an existing interactable actor into your game environment.
- Adjust Settings: Configure the actor’s settings to suit your gameplay requirements. For detailed settings of specific interaction actors, refer to the Interactable Actors section of the documentation.
Creating New Interactable Actors: #
- Add Overlap Volume: Incorporate an overlap volume to trigger the interaction popup widget upon beginning and ending overlap.
- Configure Collision: Select your object mesh, set the Collision Preset to Custom, and set the Movement channel to Block and verify the new actor has the “Interaction” actor tag. This configuration ensures the interaction trace can initiate the interact command.
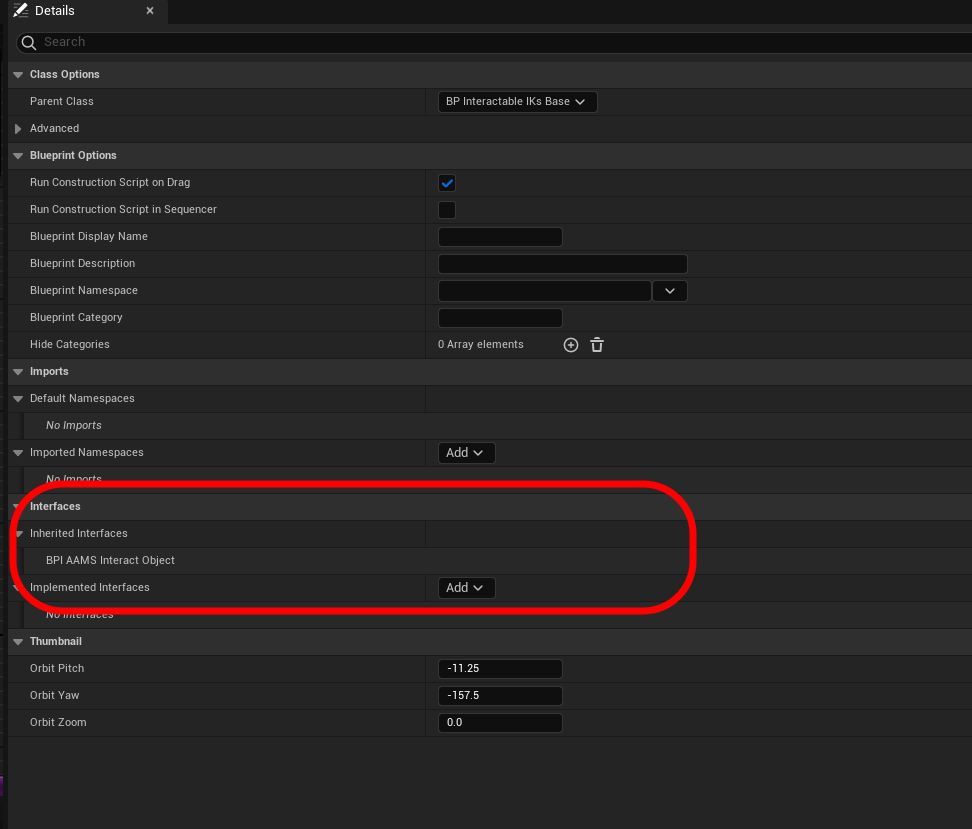
- Implement BPI_AAMS Interact Object Interface:
- In the Class Settings tab, add the
BPI_AAMS Interact Objectinterface. - Compile and save to integrate the interface events with your actor.
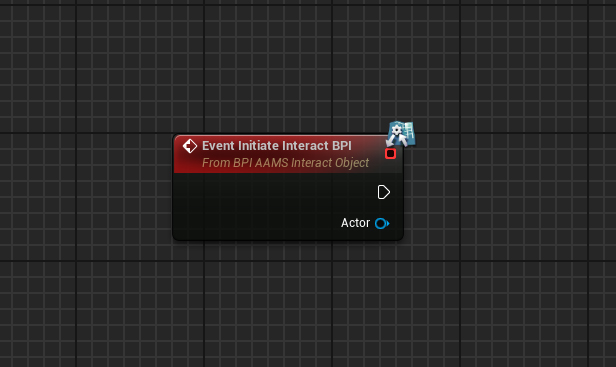
- In the Event Graph, add the
Event Initiate Interact BPIand configure the specific interaction events you want to trigger.
- In the Class Settings tab, add the
Interacting with Objects #
To synchronize an object’s reaction (like a door opening) with the player’s animation (like pushing the door), AAMS utilizes a specific animation notification system. Here’s how to set it up:
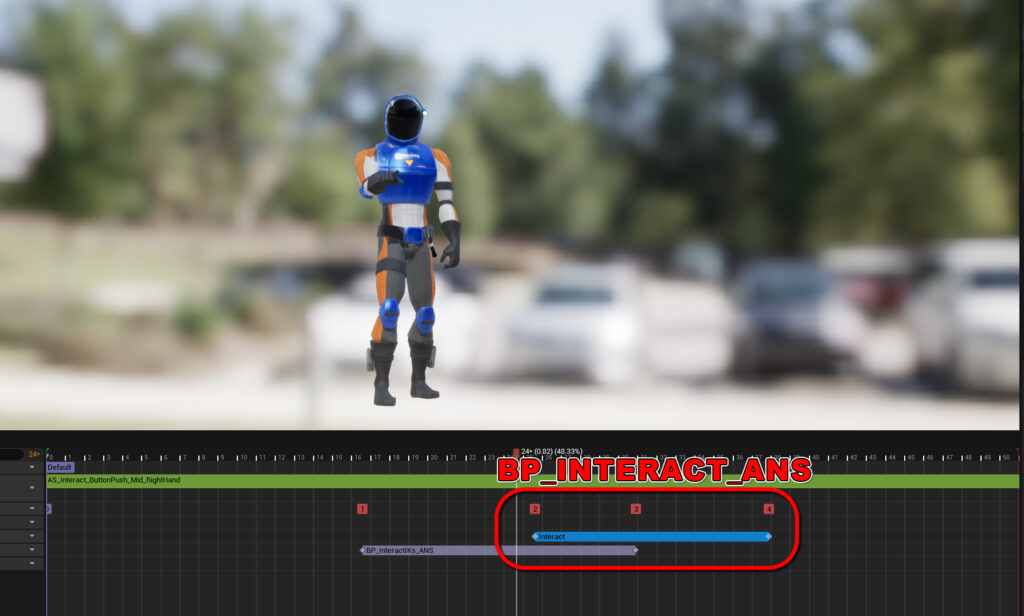
- Animation Notifier State:
- In your character’s animation sequence, add the
BP_Interact_ANSanimation notifier state. This special notifier is crucial for triggering interaction events at precise moments within the animation.
- In your character’s animation sequence, add the
- Setting Up the Notifier:
- Place the
BP_Interact_ANSnotifier at the exact frame where the interaction with the object should physically start. This timing ensures that the player’s actions visually align with the object’s reactions.
- Place the
- Triggering Object Interactions:
- The beginning of the
BP_Interact_ANSstate triggers theInitiate Object Interactevent within the character’s Interact component. - This, in turn, activates the
Initiate Object Reactionevent in the target object’s actor blueprint (e.g., a door).
- The beginning of the
- Configuring Object Blueprint:
- In the object’s blueprint (such as a door), set up the
Object Reactionevent to perform the desired actions—like opening or closing. This setup ensures that the object reacts precisely when the animation reaches the notifier state.
- In the object’s blueprint (such as a door), set up the
- Animation and Object Reaction Sync:
- Use the
Initiate Interact Eventin the object blueprint to start the player interaction animation. - The animation’s
BP_Interact_ANSnotifier will then trigger the corresponding object reaction event, such as moving the door, fully integrating the player’s actions with the environment.
- Use the

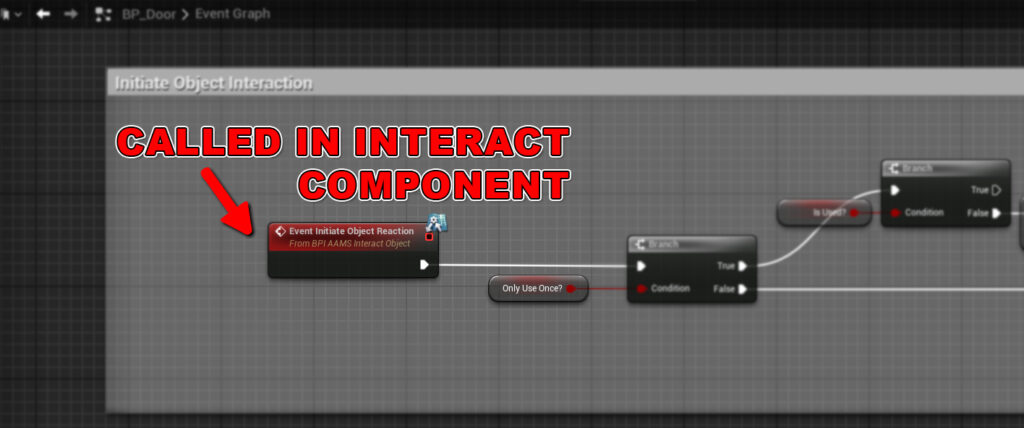
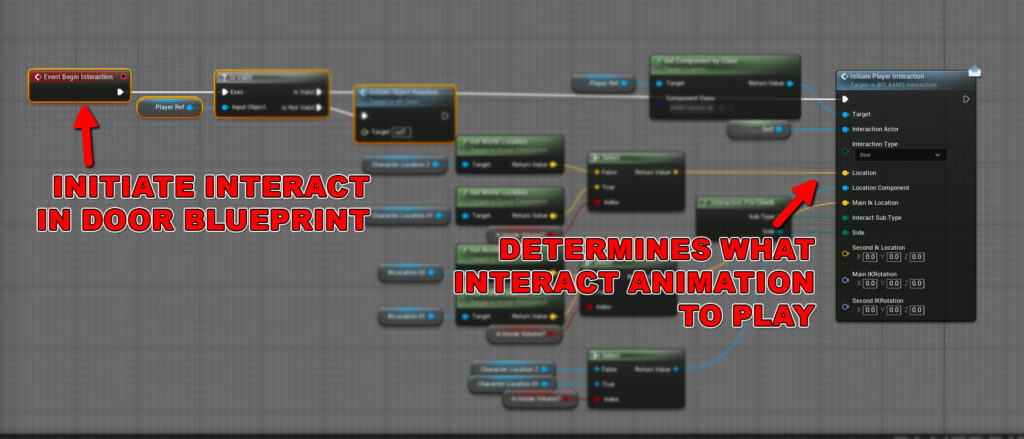
Example Implementation: #
- For a door interaction, when the player presses the interact button:
- The
Event Initiate Player Interactiontriggers, starting the animation. - As the animation plays and hits the frame with the
BP_Interact_ANS, it triggers the door to open or close, creating a seamless interaction where the player appears to be physically manipulating the door.
- The
Interaction Component Settings #
Adjust settings in your character blueprint:

- Trace Configuration:
- Trace Channel: Default set to Interaction.
- Trace Box Size: Determines the size of the Box Collision for checking interactions.
- Trace Forward Offset: Adjusts the starting point of the trace box.
- Trace End Offset: Sets how far forward or back the end of the trace box extends.
Animations for Interactions #
Animations for interactions are specified within Data Tables:
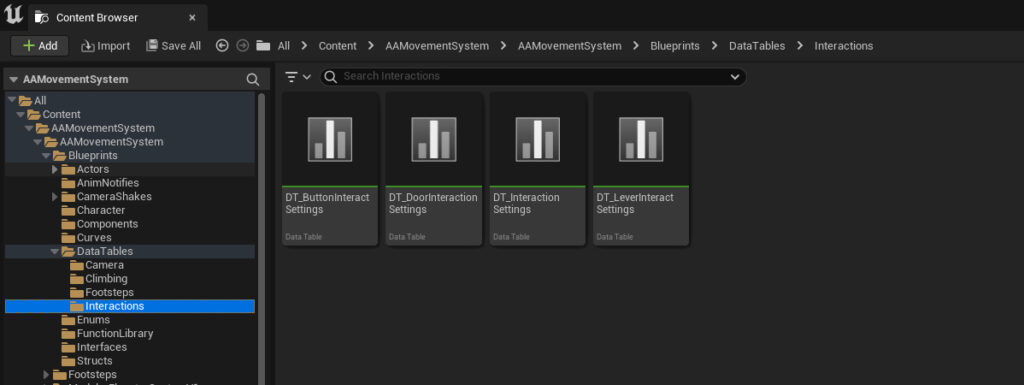
- Relevant Data Tables: Include
DT_ButtonInteractionSettings,DT_DoorInteractionSettings, andDT_LeverInteractionSettings. - Configuration: The interaction type and sub-type used to trigger specific animations are set via the
Initiate Player Interactionevent dropdowns.
Example Usage:
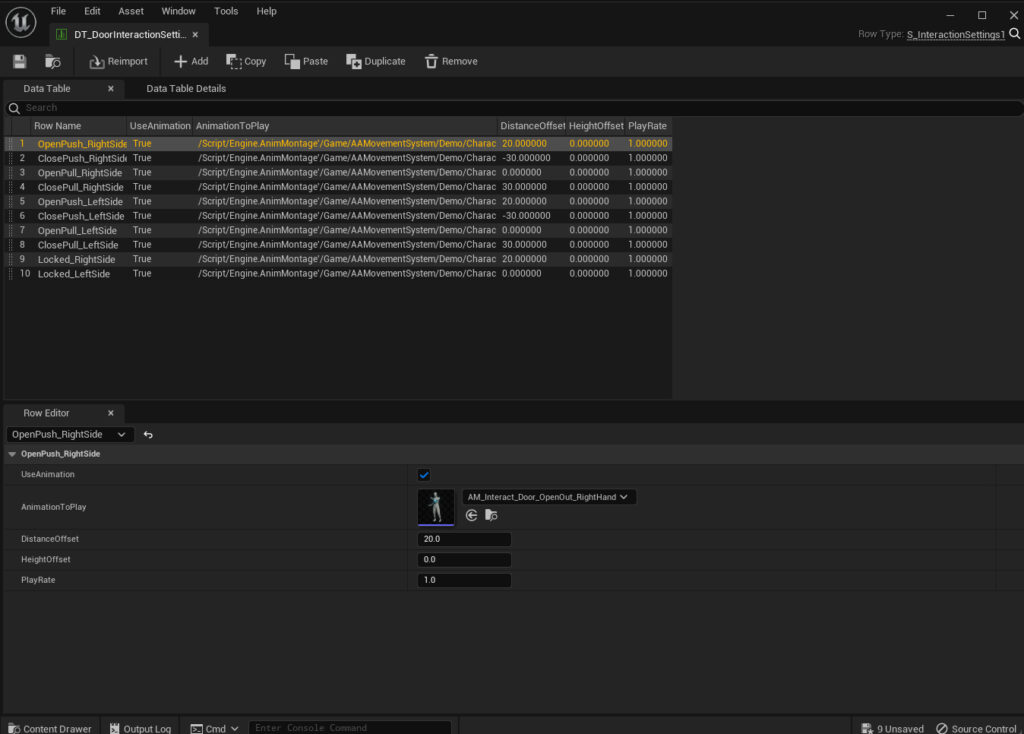
- Door Interaction: For instance,
BP_Doordetermines interaction details based on the door’s status (open, shut, locked), the player’s position relative to the door, and how the door opens. The specific interaction sub-type, such asOpen Push Right, dictates the animation sequence to be triggered, ensuring the correct animation (e.g., using the right hand to push open a door) is used.
